
Jewelry Photography Tip from a Pro: Stopping Down & Diffraction vs Focus Stacking.

Jewelry photography focus stacking
The area within the red square is show below at various apertures and focus stacked.
In jewelry photography, most of the time we need to make sure everything is pin sharp. Having some blurred stones or portions is often frowned upon unless it’s quite deliberately done and for an artistic purpose.
I sometimes receive less than ideal jewelry items to retouch where the focus is extremely limited, or everything is soft as though Vaseline was smudged over the picture. In most cases, the lens and camera are perfectly fine, but the user has done some serious mistakes with how his camera’s setting have been adjusted.
As many of you know, stopping-down a lens, or in human-like analogy, squinting your eyes when you want to see “sharper”, gives you more depth-of-field (DoF). For example, a lens shooting at f2.8, which is quite open, means the lens’ iris is nearly wide open, letting in lots of light – the image will have a very shallow DoF. Therefore to compensate, we stop-down the lens, going from f2.8 to say f5.6, f8, f11… etc.
What I want to cover today is that many of you out there are somewhat unaware of the limits of stopping-down a lens. After a certain point, every lens starts to loose overall sharpness, to the point of looking blurry. Every lens out there suffers this, it’s called “diffraction”.
To explain this, the edges of the diaphragm blades in your lens disperse light. When you begin stopping down say at f8 to f25, the diffracted light is initially a small percentage of the total light that hits your sensor, but gradually, it becomes a larger percentage of the light recorded.
How this applies to Jewelry Photography
When photographing jewelry, you are using a macro lens and usual some extension tubes. When working in the macro world, DoF is quite shallow. Any of you who’ve shot flowers or insects, heck even jewelry since you are reading this, know that unless you stop-down your lens quite a bit, you will not get enough of your subject in-focus. Therefore you tend to shoot at around f11-f16, some even f22 or higher. Have you seen a sudden decrease in sharpness in your images? Well, that’s diffraction at work. The following is an example of DoF vs Defraction as applied to jewellery photography. Note: only a little sharpening was done in Capture One Pro. Additional sharpening in Photoshop improves the images a little best kitchen knives - but those affected by diffraction, win nothing in my opinion.

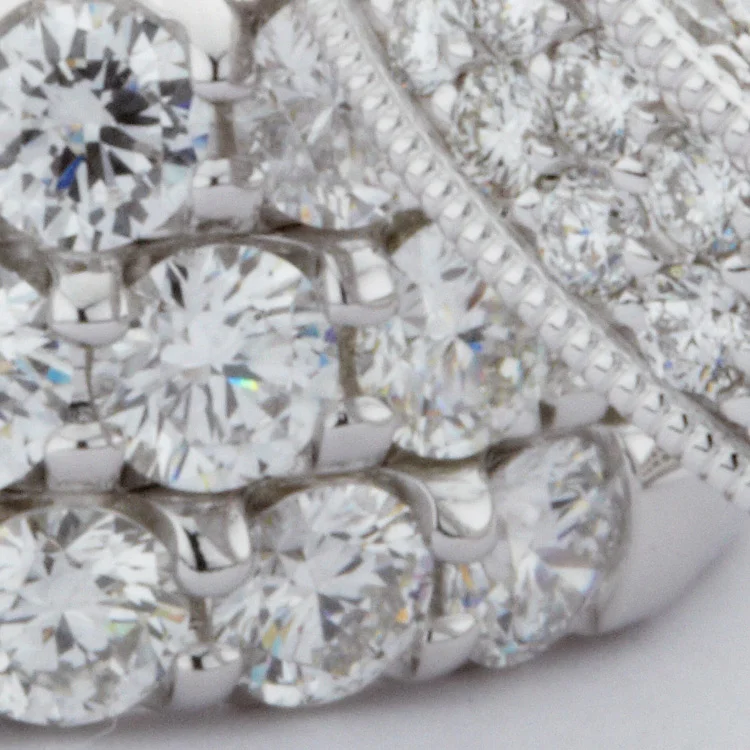
Jewelry photography & lens diffraction at f8
Shot at f8: Notice the lack of depth of field, but the portions in focus are sharp.

Jewelry photography & lens diffraction at f11
Shot at f11: Slightly more depth of field, sharpness is still good.
Jewelry photography & lens diffraction at f16
Shot at f16: Depth of field increases once more, but sharpness begins to drop.

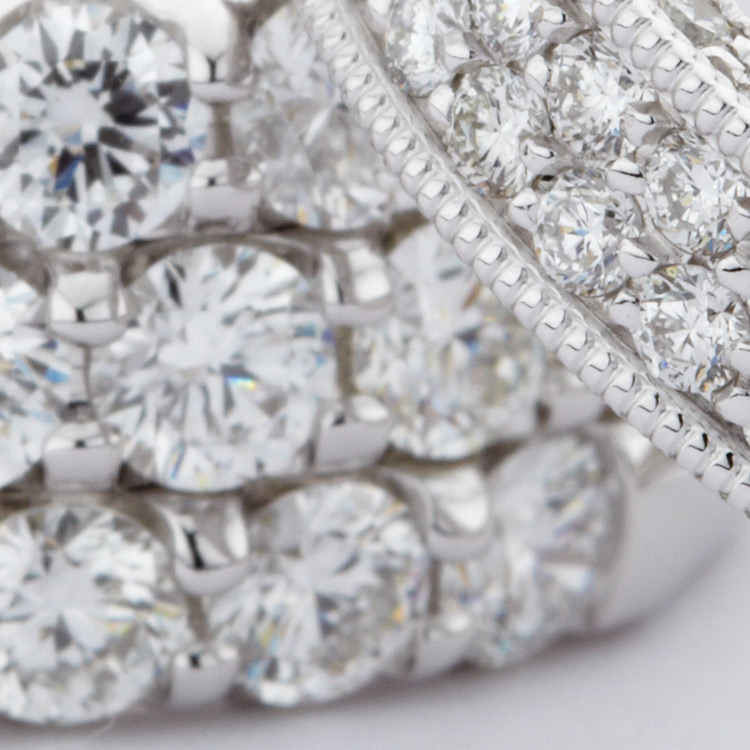
Jewelry photography & lens diffraction at f25
Shot at f25: Much more depth of field, but now image looks fuzzy.
Jewelry photography & lens diffraction at f32
Shot at f32: Not much more depth of field than at f25, but seriously diffraction is happening.
Finally, here’s an image that was done using focus stacking software. A total of 9 images were used:

Jewelry photography & lens diffraction at f8
9 photos that were stacked together, rending everything sharp.
For jewelry photography, or really, any macro photography where DoF is a must, focus stacking is the way to go for ultimate sharpness. We use Helicon Focus exclusively at the studio. It's proved itself faster and more reliable than the equivalent in Photoshop. Outside of using View Cameras with bellows, there's no way to achieve this effect. To some of you it might seem not cost-effective, but take it from me, we shoot thousands of images a year for print and web catalogs, nevermind magazine ads and trade-show displays. Focus stacking is easy, anybody can do it really. We basically start the sequence by focusing on the front-most part of the image, and with each shot, focus a little further into the image, until we reach the back. Export it with your favorite software, in our case, we recommend Capture One Pro, and then open the sequence in Helicon Focus, press the start button, you're done!
We have used a tilt-shift lens on occasions, the Canon 90mm TS/E, but we limit the use to items that would require at most 3 image stacks - pendants, certain earrings. Time is money, but critical image quality is what drives us the most.